
Display
I wanted to build a watch the minute I came across SHARP’s LS014B7DD01. It’s a 280x280, 1.39” memory-in-pixel display.
It’s from the same family of displays used by my beloved Playdate, and it’s also carried by Adafruit. The biggest selling point is their low power consumption, measured in the microwatts. The LS014B7DD01 has two main differences besides the size: it has colors and uses a proprietary parallel interface1.

Bit-Banging the Way Through
Early on, as I looked through the scarce resources on driving these displays, I came across hlord2000/SharpBitbang. This led me to one of the nicest interactions I’ve had on github.
hlord2000 had set up a breakout shield for the display on top of a nRF development kit. The hardware was there, but there was no code yet. I ordered the shield, dusted off my logic analyzer, printed out the datasheet and got to work.

Excluding power, there are 14 pins to drive this thing: 6-bits for color and 8 control signals. They had to take turns on my humble 8-channel logic analyzer.

Over the course of two months, I slowly managed to implement a questionable but working driver on my spare time. With partial updates, it runs at an acceptable frame rate on Zephyr with lvgl:
Relog running LVGL
LVGL’s perf overlay. The FPS counter is cheating a little: we’re doing partial updates
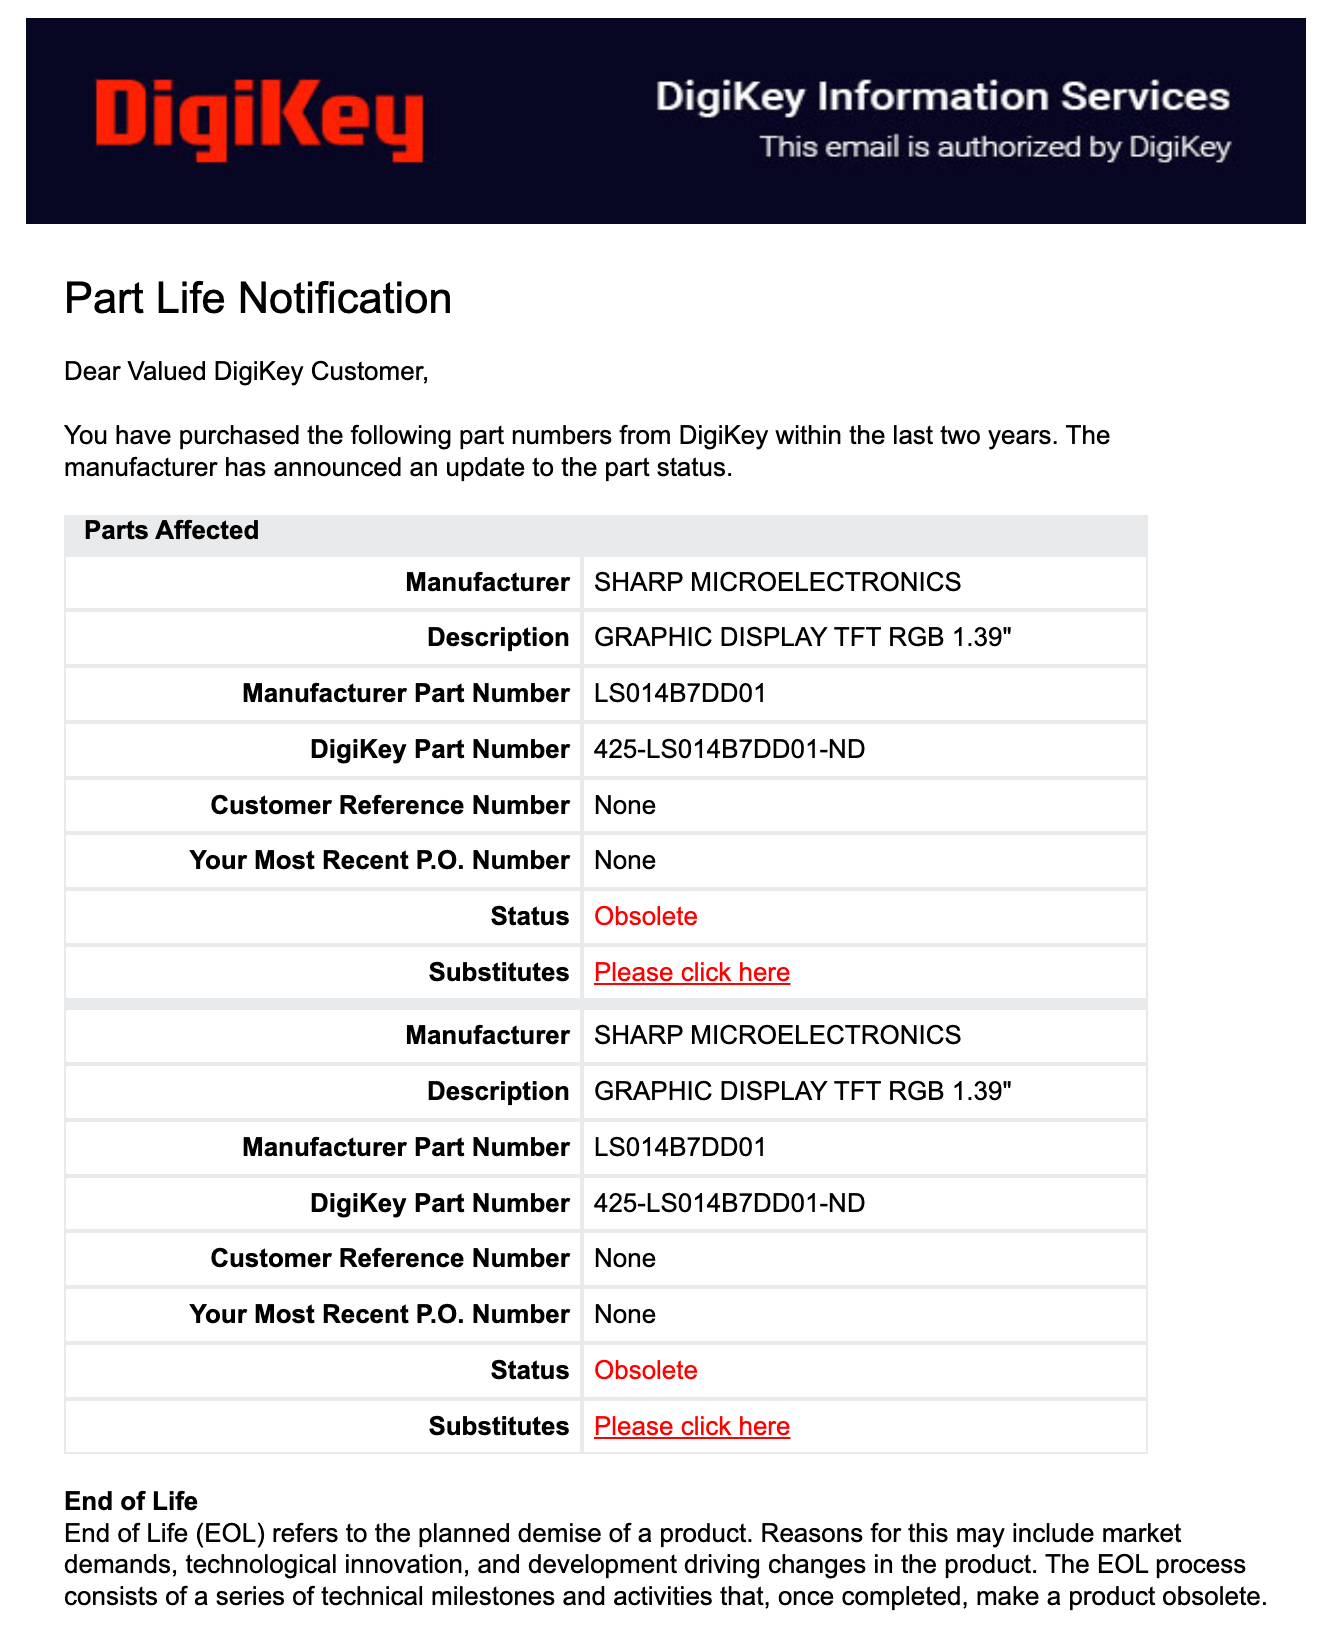
The whole saga is documented in hlord200/SharpBitbang/pull/1. This was one of my favorite parts of the project. And to top it off, I got it working just in time to celebrate the new status of the display on Digikey on May 12 2025: obsolete.
I packaged the driver as a standalone west module in rbaron/sharp-ls0xxb7-bitbang. It can be used in any Zephyr project as an out-of-tree driver like so:
# In your project's west.yml.
projects:
  - name: sharp_ls0xxb7_bitbang
    path: modules/sharp_ls0xxb7_bitbang
    revision: main
    url: https://github.com/rbaron/sharp-ls0xxb7-bitbang
There are some hardcoded dimensions and clock-cycle constants, but it should work for other display variants with small tweaks. In fact, as I write this I see someone did exactly that on a fork. I hope it keeps on taking a life of its own and some improvements are upstreamed.
Hardware
SoC
I chose the nRF54L15, the newest from the nRF5 series. These are my go-to low power Bluetooth Low Energy chips, and I wanted to experiment with the latest generation. I really like Nordic’s SDK, documentation, examples and community. It doesn’t hurt that it’s the same platform on which I developed the driver.
With only 256 KB of RAM, I can’t even fit a single full LVGL color buffer in memory by itself. Their big brother nRF54H20 has 3x the clock speed, 4x the RAM and native USB, but it wasn’t generally available at the time, otherwise I would have gone for it.


The nRF54L15 has a RISC-V coprocessor. In theory it can be used to implement a SoftPeripheral, in which the bit-banging would be done by the coprocessor instead of the main CPU, freeing it for other tasks. This sounds great, but I haven’t explored this yet.
Power Management
I found out about the nPM1300 from the nRF54L15 DevKit. These are a all-in-one power management ICs: battery charger, two buck converters, two LDOs, programmable GPIOs, voltage monitor. Charge rate, min/max voltage and GPIOs can all be controlled over i2c. It’s as great as it sounds.
Sensors
For good measure I slapped a LSM6DSL accelerometer/gyroscope and an SHT40 temp/humidity sensor. These are cheap, low power and have ready to use Zephyr drivers. To be honest, I still haven’t done anything with these two, except initializing them into a low power state.
Programming Interface
After years of watching Phil’s Lab use Tag-Connect for debugging, I finally used it on my own design. It’s great for in-place programming. I also made a little adapter board for 6 and 10-pin Tag-Connect to J-Links:

Design Mistakes
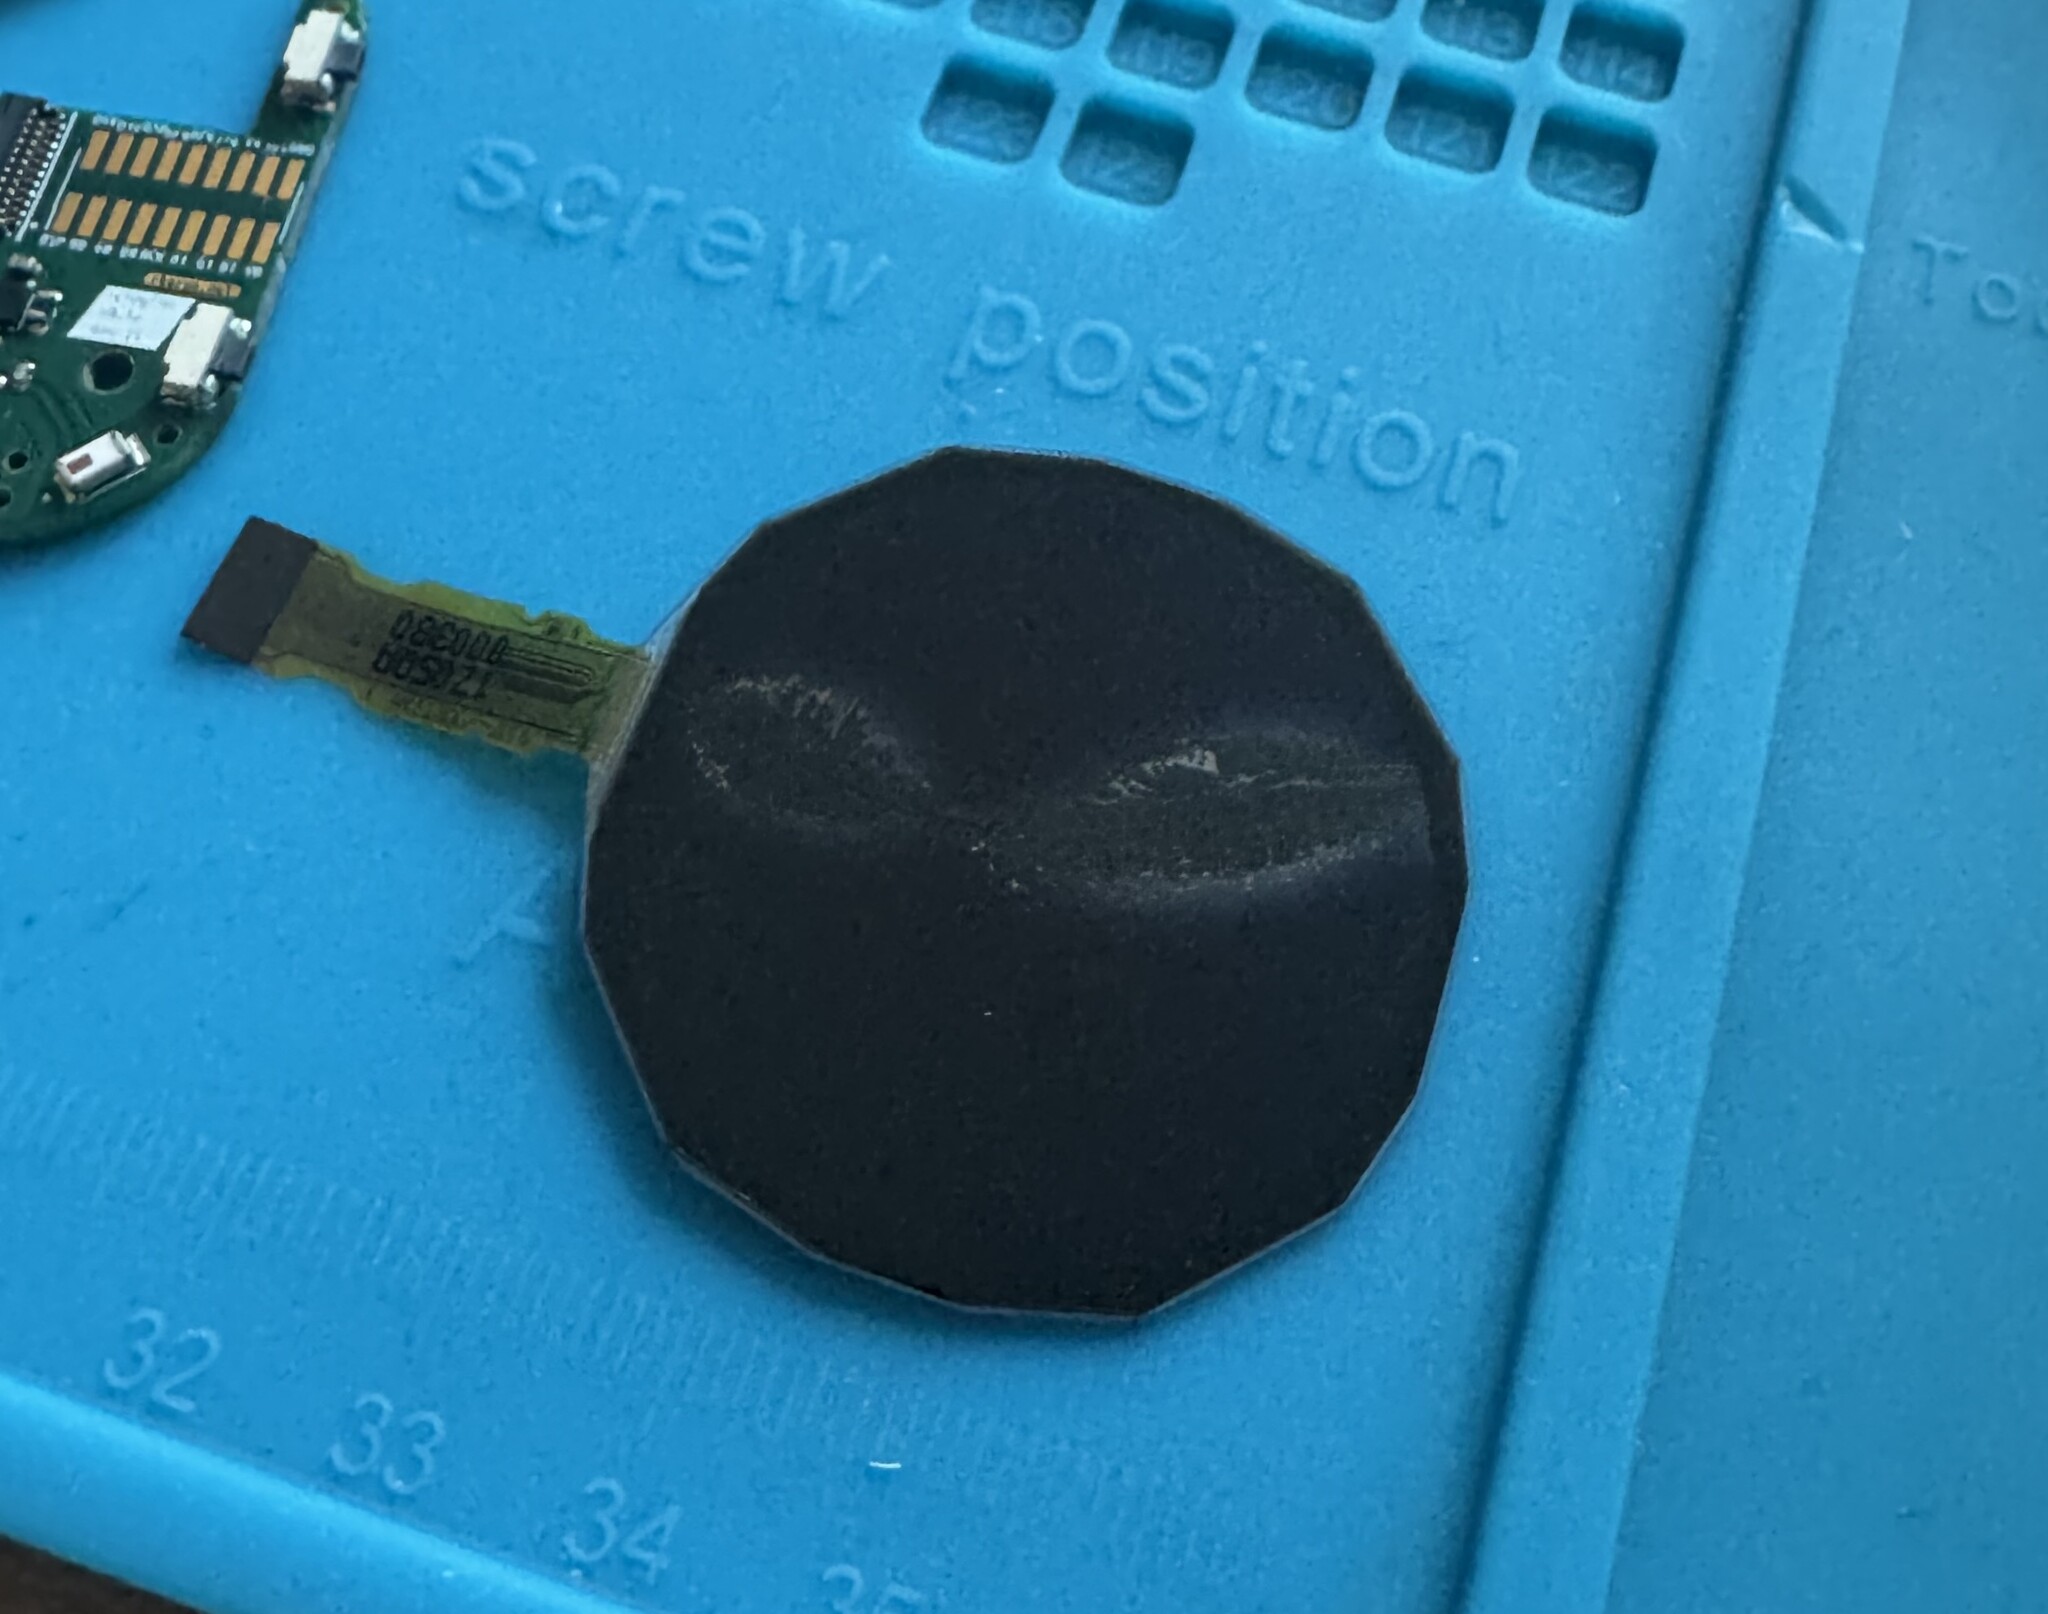
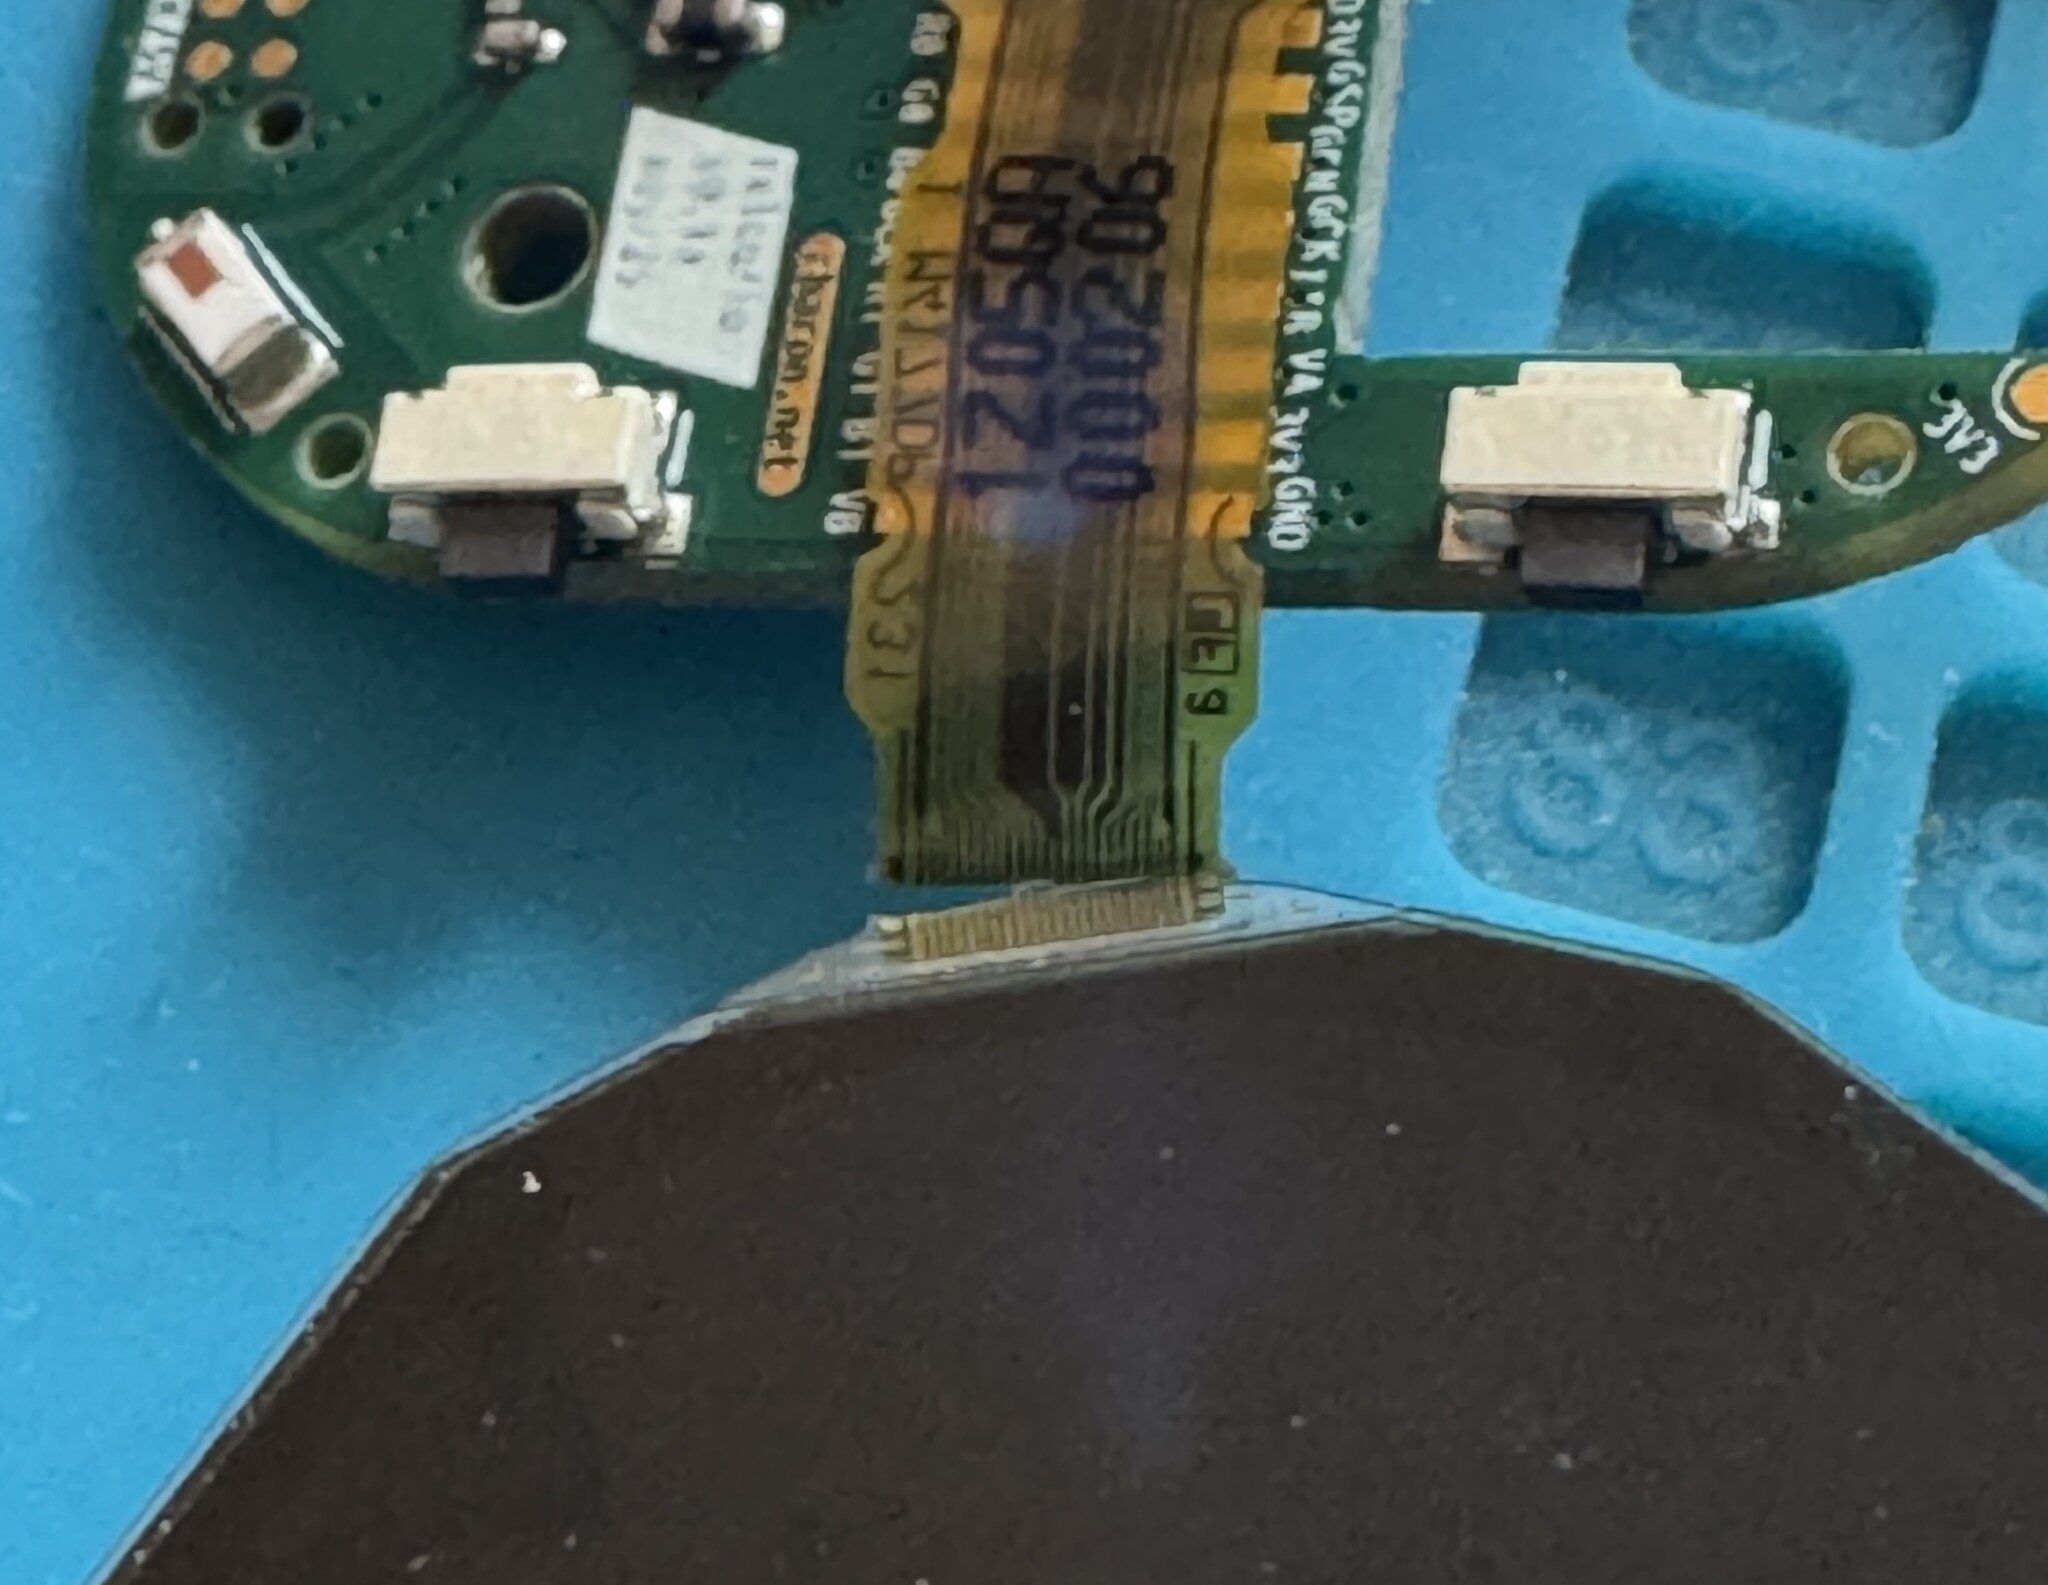
Horizontally Mounted Display
Note in the image above that the display’s flat cable comes out on the side of the watch. This is technically fine, except for two subtle issues with negative interplay:
- On the physical display, partial updates work by skipping rows. Non-skipped lines must be drawn in full;
- To fit memory, LVGL’s partial rendering mode maintains a small buffer that is a fraction of the screen size (1/10 by default); Updates are drawn to the buffer from top-to-bottom, 10% at a time.
You can see where this is going.
The fix was to apply a clockwise 90-degree rotation to all LVGL elements before drawing it to the buffer. This has a performance hit, but it’s not too bad. Worst is that, still, we’d need to fill the buffer in vertical strips left-to-right, so we can fast-skip rows on the physical display. I couldn’t find a way to do this in LVGL, so I forked it and added column-major partial updates. I was crying the entire time.
You bet the next time I use this display I will mount it in its natural orientation. This hack lives in rbaron/lvgl/tree/v9.3.0-dev+tiling-vertical. If any LVGL expert knows of a better solution, pretty please reach out. I would be a lot happier if I could obliterate this fork.
No i2c Peripherals on Port 2
To write a fast parallel bit-banging driver, one optimization is to place related GPIOs on the same port. This lets us toggle all of them with a single instruction.
Excluding power, that are 14 signals to drive the display. The tightest loop sets the color on 6 pins and controls the column-latching mechanism; I routed these first, all on the same port. In the end, I didn’t have lots of pins left, so I slapped the i2c lines for talking to the power management IC and sensors on port 2.

Big mistake: no i2c peripherals on P2. Chat, I thought I was cooked. Then I saw the light: the i2c bit-banging driver. If there’s ever a next revision, I will reroute these through P0 or P1 and rely on the hardware i2c drivers instead.
Although I have to say this: I am kind of proud of saving this PCB run with yet another bit-banging driver. We are now two bangs deep. Onward.
Out-of-Spec Oscillator
I wanted the low frequency crystal oscillator to be as accurate as possible. I found a 10 ppm one from Seiko on JLCPCB parts catalog. Great, I estimated the time drift to be at most around 1 second per day over a reasonable temperature range. This is okay, as I planned on pinging my phone over BLE for time sync every so often.
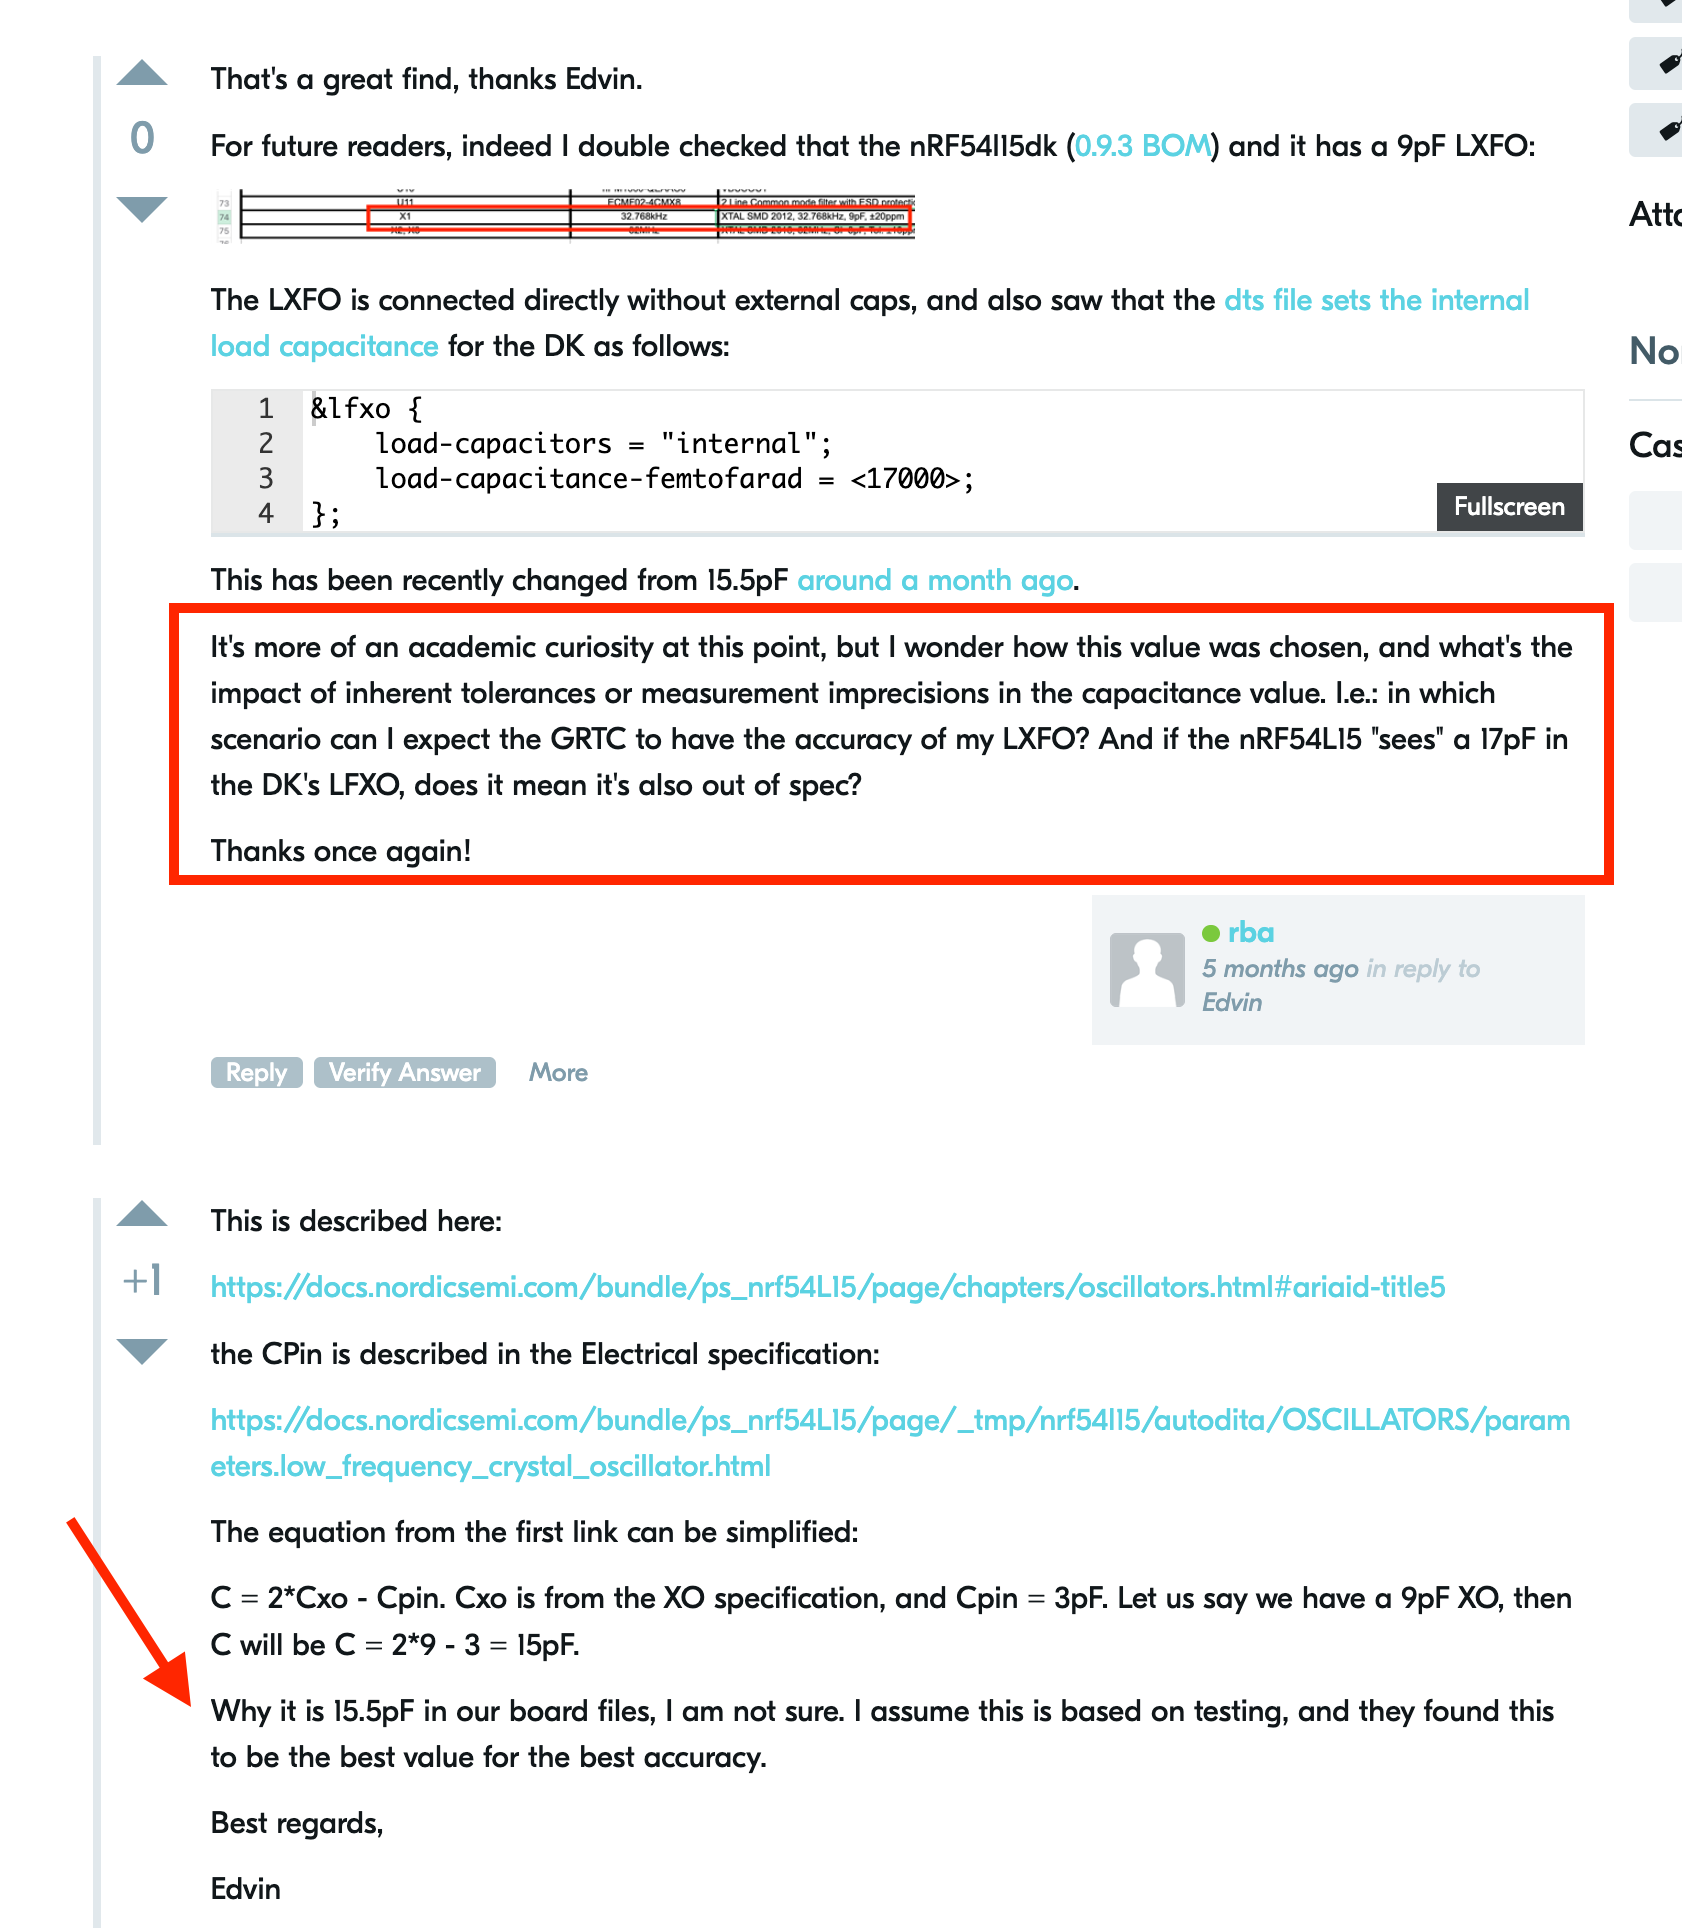
In practice, I saw a 3 seconds drift overnight. I reached out to folks on Nordic’s DevZone who pointed out the oscillator I picked is out of spec: it requires 12.5 pF external load capacitors, and the nRF54L15’s internal ones only go up to 9 pF. Whoops.
The story goes a bit deeper though. It seems capacitive tuning is required to get the nominal accuracy out of the oscillator. So while nRF’s counter peripheral has an accuracy equal to the crystal’s clock, I’m not sure how much of the 10 ppm transfers over, and with how much tuning. I also don’t understand whether or not the current tuning from the DK is out of spec.
This was a nice educational detour, and with BLE time sync it becomes less of an issue. It would’ve been nice to have independent, great timekeeping though. Next time I’ll stick to a cozy temperature-compensated RTC module.
Battery Life
Picture a 280x280 pixel display with 6 bits of color per pixel. Even if we could flip all data GPIOs at the same time, we’re looking at 80k register writes on a for loop to push a single frame.
For any hope of reasonable battery life, we must:
- Get the bit-banging driver to bang very fast;
- Update the display as rarely as possible;
- Rely on partial updates.

For 1., the biggest win was to group all color GPIOs on the same port. At first I went for direct register access, but then reached for gpio_port_set_masked_raw, which I found provides similar speed with better portability. Later I implemented a lookup table for colors to bit states to speed up the per-bit color mapping computation.

For 2., I set up a ZBUS listener that updates the display only on certain events: on minute change, on BLE connection/disconnection/notifications and on user input. Whenever a system needs the display to update, it pings ZBUS with an event on this channel.
If partial update is implemented in the driver, LVGL’s partial updates should work out of the box. The driver receives the area of the screen to update with (x, y) coordinates and refreshes only that area. The last piece of the puzzle is that, since the display requires we update each row in full, we have to ask LVGL to always start at x = 0 (but at any y).
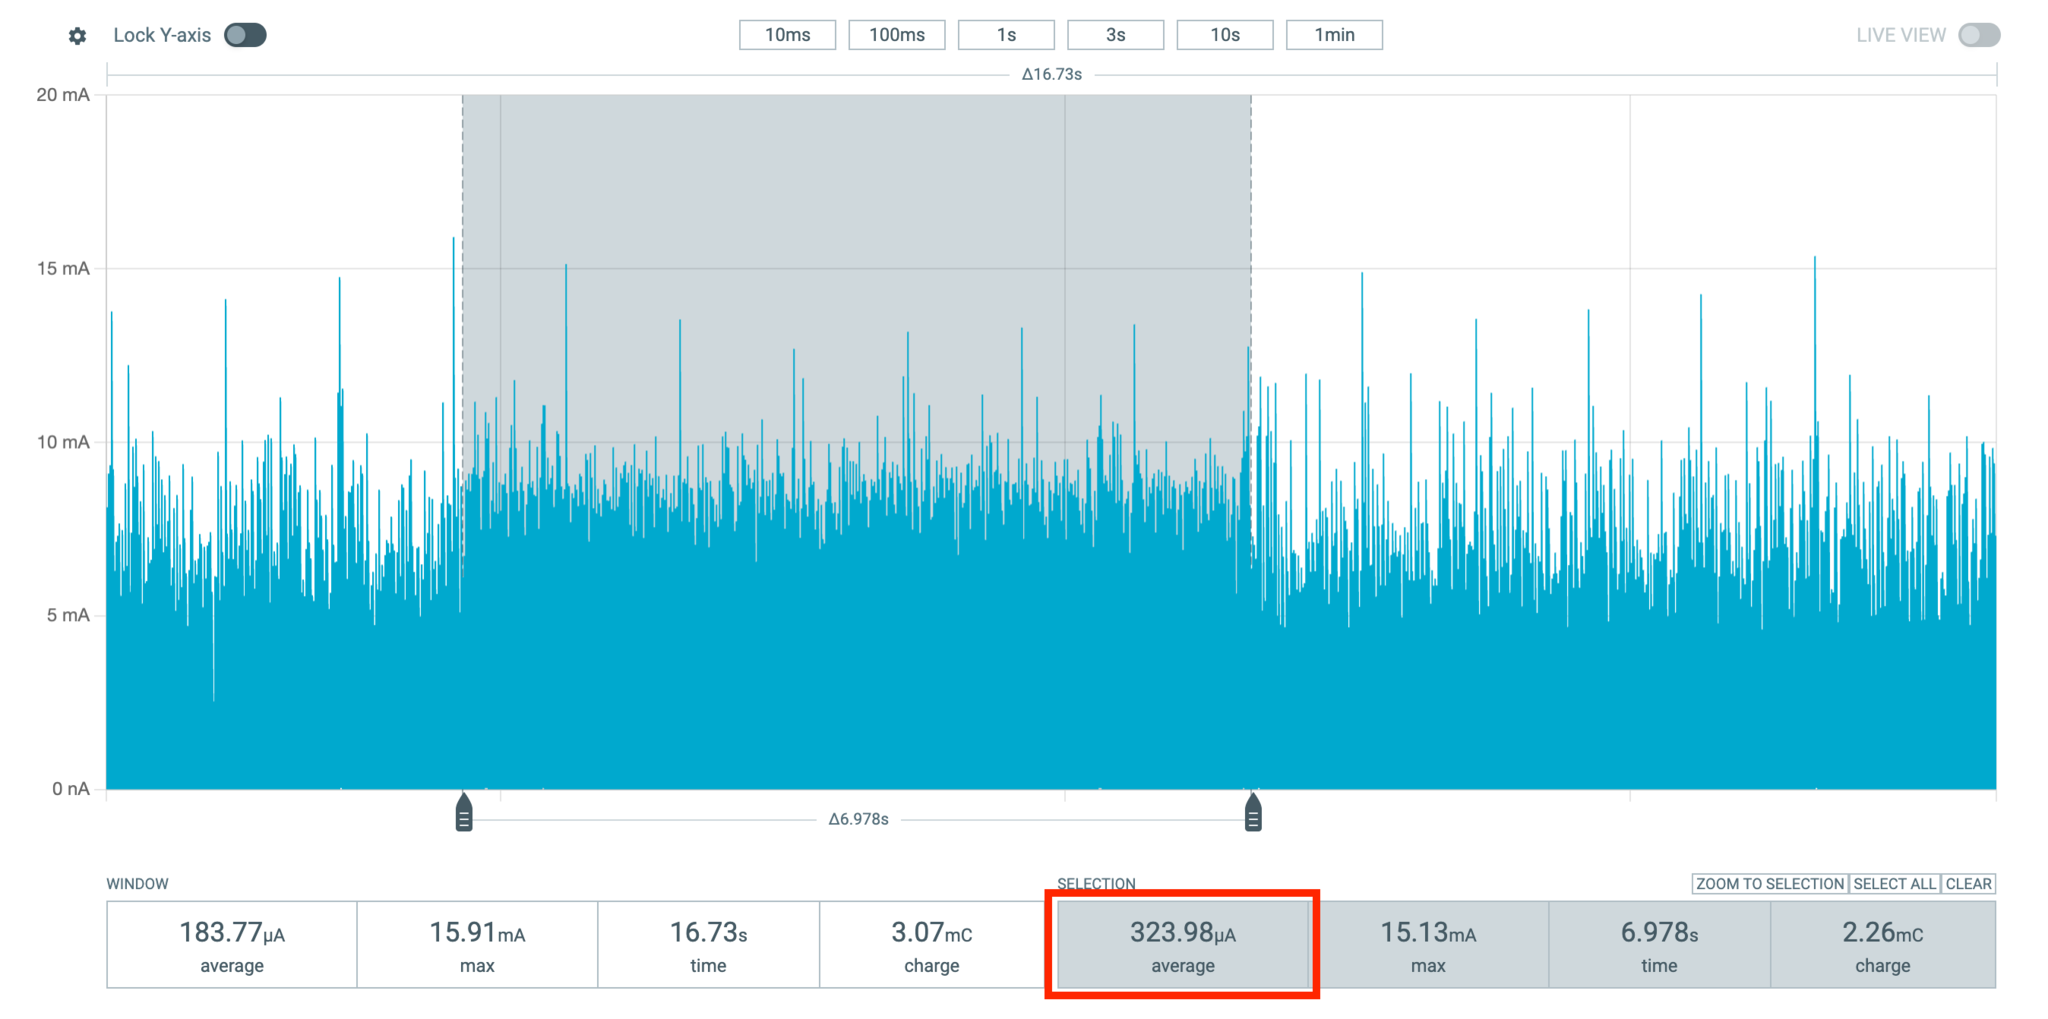
When idle, with the display on and BLE connected, the watch draws about 54 uA2 on average, spread across the display, its 5 V charge pump, SoC, sensors and the 3.7 V -> 3.3 V buck converter (the 54 uA are measured at the battery input). On a real-world usage pattern, it averages out to about 85 uA over 2 minutes:

I invested a lot of attention on getting this right and I’m happy it didn’t go to waste. With a tiny 120 mAh LiPo battery, I’m getting almost 4 weeks between recharges3. This is roughly half the capacity of a typical CR2032 coin cell.
There’s still space in the case for a larger battery and more aggressive optimizations to be done. For example, the whole system can be turned off (except for the low frequency crystal oscillator) when the watch is still for a period of time. I do think it’s sweet to sport such a tiny battery and an always-on display though, and still have juice for one month.
No Companion App? No Problem
From Apple’s Accessories Design Guidelines, iOS devices offer by default a few Bluetooth Low Energy services. These include the Current Time Service (CTS), Apple Notification Center Service (ANCS). While I haven’t found it in that document, iOS also offers the Apple Media Service (AMS) for controlling media playback and volume over BLE.
If I can get the watch to connect to my iPhone, I get all these features for free. Even better, Nordic has examples on how to use these services in their SDK:
The HID Hack

Nordic examples work great, but it uses the nRF Connect App to scan and connect to the clients. In general, BLE devices do not automatically show up in iOS’ Bluetooth settings.
Except some do. I used a BLE keyboard in the past and I vividly recalled finding it there. Sure enough, when running Nordic’s HIDS keyboard example, it does pop up.
It turns out that if we advertise a HIDS service, we can connect to our devices through the settings, no extra apps required:
static const struct bt_data ad[] = {
    BT_DATA_BYTES(BT_DATA_FLAGS, (BT_LE_AD_GENERAL | BT_LE_AD_NO_BREDR)),
    BT_DATA_BYTES(BT_DATA_GAP_APPEARANCE,
                  (CONFIG_BT_DEVICE_APPEARANCE >> 0) & 0xff,
                  (CONFIG_BT_DEVICE_APPEARANCE >> 8) & 0xff),
    BT_DATA_BYTES(BT_DATA_SOLICIT128, BT_UUID_ANCS_VAL),
    BT_DATA_BYTES(BT_DATA_UUID16_ALL, BT_UUID_16_ENCODE(BT_UUID_HIDS_VAL),
                  BT_UUID_16_ENCODE(BT_UUID_BAS_VAL)),
};
This lets me easily connect to the watch and get access to all those services. I use the Current Time Service to keep the watch time in sync. Pretty handy when traveling and on daylight saving time changes. Since I have no real-time clock (RTC)4, this keeps the time from drifting appreciably.
Mechanical Parts


After the first fit check, I went a little overboard and ordered a bunch of prints with different materials from JLC3DP (not sponsored):

From left to right, top to bottom:
- SLM TC4 titanium alloy
- SLA 8001 transparent resin with a black PLA faceplate
- SLA black resin
- SLM 316L stainless steel. Amazingly cool that we can do this for $8
- SLA 8001 transparent resin with an orange PLA faceplate
- SLS 3201PA-F Nylon
- Home-printed PAHT-CF
- Home-printed PLA
- MJF PA12-HP Nylon
Except for the metal ones, I got 4 of each, including the back cover. With coupons, these all cost me $40 (plus shipping).
TC4 Titanium Case
I still can’t believe that in 2025 we can get these made for ten bucks.


At this point I thought it was actually too shiny. I used a buffing wheel to matte it down to a more industrial, rugged look:

Screen Protection
The display is pretty fragile. I mounted a round sapphire (sure, wink) glass from Aliexpress slightly spaced in front of it.

What Went Poorly
RF Performance
It’s not fantastic. I have routed RF sections twice in the past with moderate success using more good intentions than knowledge. This time, the range is worse. BLE does remain connected to my phone when both are in the same room, but not much further. It does automatically reconnect when back in range, so it’s not a showstopper. It’s more annoying when broadcasting BLE data via BTHome, for example, when the receiver may be further away.
There’s probably impedance matching mistakes on my end, and I should have been more generous with the keep-off areas around the antenna. The titanium half of the case is probably not helping. Another oversight was putting the hole for the mounting screw too close to the antenna.
Front Light

I tried to beat the system by installing a front-mounted LED in the hopes that it would somehow indirectly provide some light to the display. It doesn’t work at all.
Somewhat surprisingly though, months later while I was at the movies, I realized that if I place my finger in front of the display while the LED is on, light bounces back at the display. In pitch dark, I can kind of read 1/3 of the hours-digits this way. Swiping my fingers up and letting my brain stitch together the pieces sort of works.
Is it absurdly impractical? Yes. Can it get me out of a minuscule inconvenience once in a while? Eh. Not really but kind of yes?
What Went Well
The Display Driver
By far the biggest unknown. Getting it to work was my favorite part, and watching it go on my wrist every day is really satisfying. Every time I check the time, I collect a little bit of dividends on that joy.
Power Consumption

An always-on display + BLE running on a tiny battery for a month is pretty sweet for a hobby project.
The Looks

It’s the right amount of weird. From the start I avoided the typical round smartwatch look. Mostly out of fear people might mistake me for someone who can actually run a 10k.
New 3D Print Materials
I enjoyed learning that I can do metal and resin prints on the cheap now. It opens up lots of possibilities. I think the titanium case looks great after sanding and polishing. I wear the transparent resin case sometimes too. The effects of UV light on it remain to be seen.
Less Phone
I like that my Casio AE-1200WH never bothers nor distracts me. If anything, checking the time on it keeps me from looking at my phone. I wanted to replicate that.
I even removed some features to get there. The first thing to go were notifications over BLE with ANCS. BLE media control is net positive, as sometimes I want to check out the artist or song name without pulling out my phone.
Demos
Look and feel
Media control
Infrared
BTHome triggering a Home Assistant automation

Financials
| PCB, components, assembly + shipping (5 items) | $140 + $30 |
| Displays (5 items) | 5 x $30 = $150 |
| Cases + shipping (5 designs) | $40 + $40 |
| Batteries (5 items) | $20 |
| Straps (1 handcrafted leather + 2 silicone) | $30 |
| Taxes | ~$80 |
| Total | $540 |
| Total per watch | $108 |
Was it Worth It?
Short answer: yes.
Any way you slice it, the time investment really dwarfs the financial cost. I tend to view this under a positive, if rationalizing light: For a few bucks per hour I got to try a bunch of new things, learn a lot and entertain myself for a few months. I even ended up with a handful of odd looking watches for free.
In all honesty, I don’t know if I would pay $100 for one of these off the shelf. I do know that I wouldn’t trade having built it for a Rolex. So, long answer: hell yes.
-
SHARP offers a range of such displays. Black-and-white variants work over SPI. Japan Display Inc. (JDI) also offers MIP displays. As far as I can tell it’s the exact same proprietary parallel interface, but with slightly different signal names. ↩
-
I’m not sure why the current is so spiky. I see the same behavior in the nRFL15DK. I would guess
npm1300switching is causing this, but I haven’t investigated further. ↩ -
This is less than the theoretical 8 weeks (120 mAh @ 85 uA). It could be a combination of the questionably sourced battery having less than nominal juice or states not shown in the power profile. For example, whenever I press a button, the power consumption jumps to 320 uA due to pull-ups and display update; Sometimes the display is in “fast-update” mode (e.g.: when showing the seconds in addition to the usual hours/minutes), which is much costlier than the normal idle state. ↩
-
No RTC. This is a controversial design decision, even for me who made it. I hoped to rely on the
10 ppmlow-frequency crystal oscillator for decent time keeping but the universe had other plans. Either way, together with a time sync every 10 minutes over BLE, the drift is never more than fractions of a second. ↩